Plenty of guides online tell you to switch off dozens of Windows features at random to squeeze out more FPS. Not all of those features affect game performance, though, and some of them are tied to your PC's security. That's why the best Windows 11 settings for gaming come down to the options with a real impact, from Game Mode and graphics acceleration to your processor's power profile and core security features.
Below are the Windows 11 settings worth tuning, along with the benefits, limits and risks of each.
Best Windows 11 Settings for Gaming at a Glance
Setting | Recommendation | Notes |
|---|---|---|
Game Mode | On | A sensible starting point, not a guaranteed FPS boost |
Record what happened | Off if you don't use it | Leave it on if you need instant replay |
Hardware-Accelerated GPU Scheduling | On if supported | Can be required for NVIDIA DLSS Frame Generation |
Optimizations for windowed games | On | For DirectX 10/11 games in windowed or borderless mode |
Refresh rate | Your monitor's highest | Check again after changing cables or monitors |
Variable Refresh Rate | On if your display and GPU support it | Needs a G-SYNC or FreeSync monitor |
Power mode | Best performance | Keep an eye on laptop temps and battery |
Startup apps | Disable what you don't need | Don't turn off driver or security utilities |
Memory Integrity (HVCI) | On (default) | Only test Off if you have a measurable performance problem and understand the security risk |
Windows 11 Game Mode and Captures
Game Mode: On
Go to Settings > Gaming > Game Mode and make sure it's turned on. According to Microsoft, Game Mode stops Windows Update from installing drivers and sending restart notifications while you play. Think of it as a sensible starting point, not a guaranteed FPS boost.
Captures (Record what happened): Off if you don't use it
Go to Settings > Gaming > Captures and turn off background recording (Record what happened) if you already use NVIDIA ShadowPlay, AMD ReLive or OBS. Background recording uses encoder and storage resources while your game runs. If you actually rely on Windows' built-in instant replay, though, leave it on.
Hardware-Accelerated GPU Scheduling and Windowed Games
For the graphics side, go to Settings > System > Display > Graphics > Default settings (the layout and menu names can vary a bit depending on your version of Windows 11). Check these two options there.
Hardware-Accelerated GPU Scheduling (HAGS): On
HAGS lets a compatible GPU take over part of the graphics scheduling work the CPU used to handle. On NVIDIA, support starts with the GTX 10 series, while on AMD it first arrived for only some RX 7000 series cards. It won't always raise your FPS or cut latency. In Tom's Hardware's testing, game performance was nearly the same with HAGS on or off. On NVIDIA GPUs that support DLSS Frame Generation, HAGS can be one of the requirements for using that feature. Frame Generation support itself depends on your GPU generation and which version of the tech you're using. Turn HAGS on if your card supports it, then compare performance and stability before making it permanent.
Optimizations for windowed games: On
According to Microsoft, this feature uses a more modern presentation model for DirectX 10 and DirectX 11 games running in windowed or borderless mode. That can reduce frame latency and enables features like Auto HDR and VRR on compatible hardware. Even so, not every game will feel exactly the same as it does in exclusive full screen.
Related Article: Best CS2 Launch Options and Autoexec Setup Guide
Refresh Rate, VRR and SSD
A lot of gaming monitor owners don't realize their screen is still running at 60Hz, for example after reinstalling Windows or swapping cables. Under Settings > System > Display > Advanced display, make sure Choose a refresh rate is set to your monitor's highest option (144Hz, 165Hz, 240Hz and up).
After that, use VRR if your display and GPU support it. VRR helps cut down on tearing and stutter when your frame rate moves around within the refresh rate range your monitor supports. The results still depend on your game settings, drivers and FPS cap.
For storage, installing games on an SSD, especially an NVMe SSD, can help shorten load times in games that need fast data access. DirectStorage can add extra benefits in games that support it, but it won't automatically speed up every game just because you're on Windows 11.
Power Mode and Startup Apps
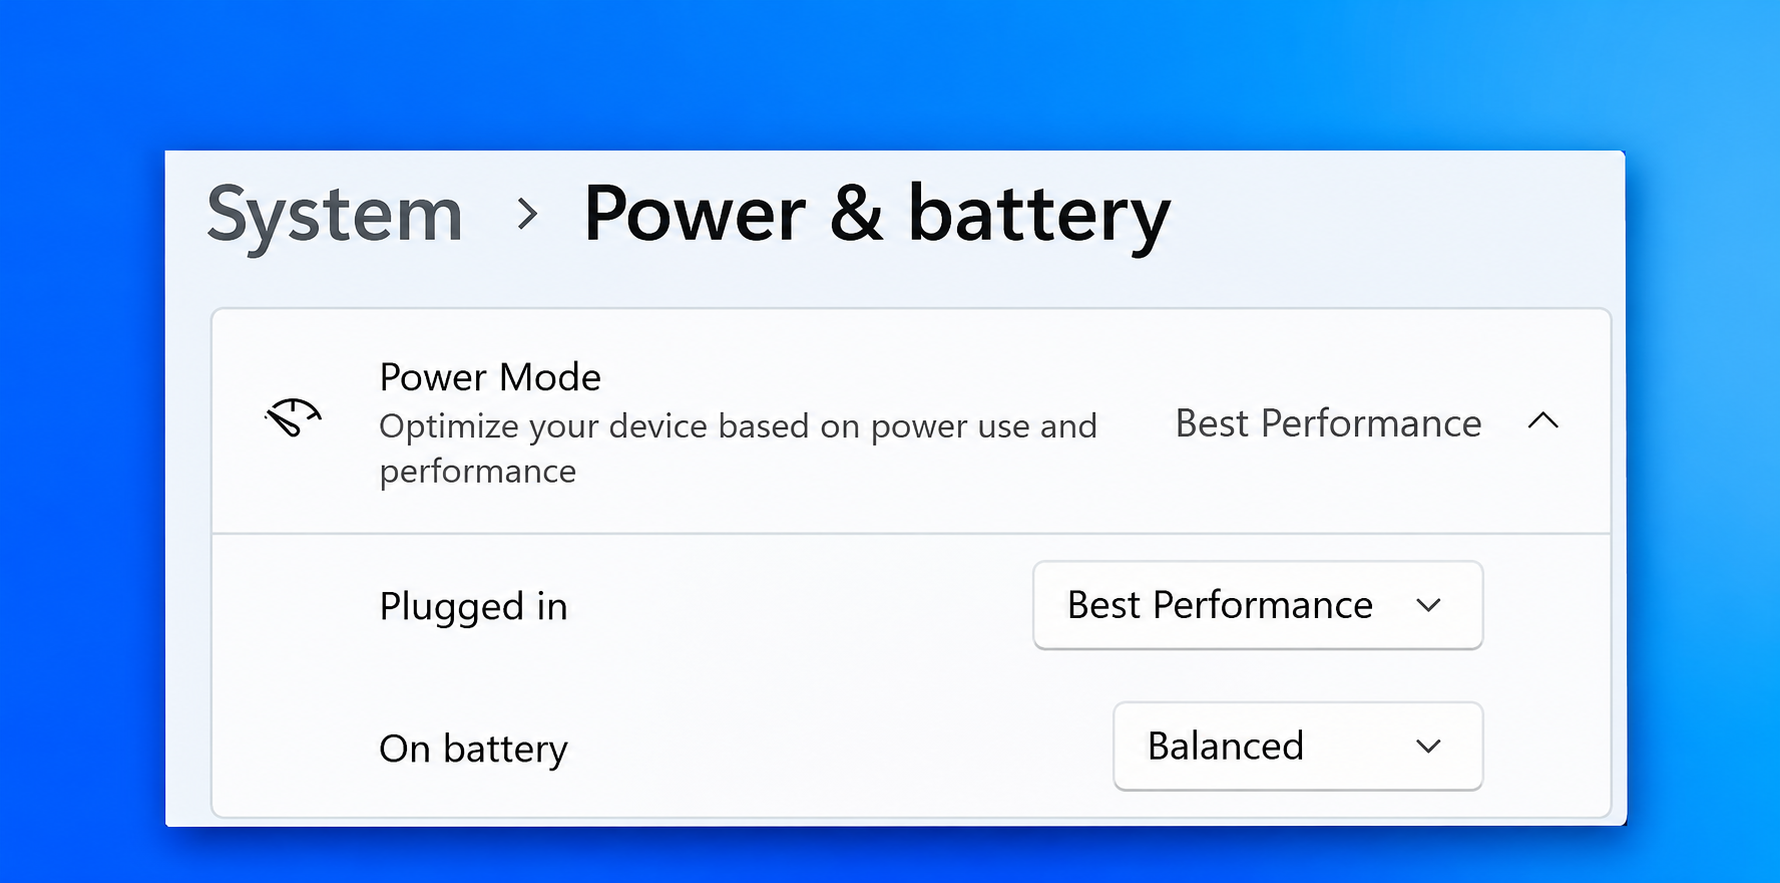
Power Mode: Best performance
Go to Settings > System > Power & battery (or Power on a desktop PC) and set Power mode to Best performance, especially when your laptop is plugged in. This profile tells the system to prioritize performance, but on a laptop, watch your temperatures, fan noise and battery life.
Startup Apps: Disable What You Don't Need
Press Ctrl + Shift + Esc to open Task Manager, go to the Startup apps tab and disable secondary game launchers or any app that doesn't need to run as soon as your PC boots. That way, background apps use less RAM and CPU before you open your main game. Be careful not to disable driver utilities or security software without thinking it through.
When Should You Disable VBS and Memory Integrity in Windows 11?
How VBS and Memory Integrity Affect Performance
Memory Integrity, also known as HVCI, is part of Virtualization-based Security (VBS). It helps protect the Windows kernel from malicious code and drivers. On some PC configurations, VBS can add overhead that affects game performance, especially when the processor is the main bottleneck. The impact varies from one machine to another.
In Tom's Hardware's 2023 testing with an RTX 4090, a Core i9-13900K and 15 games, turning off VBS improved performance by about 5% on average. At 4K Ultra, the gap shrank to around 2% because more of the load sat on the graphics card. The biggest drops, around 10%, showed up in Microsoft Flight Simulator, Far Cry 6 and Control. Those numbers come from 2023 testing, so they aren't a hard rule for every Windows 11 PC today.
This setting matters more now that Microsoft has started turning Memory Integrity on automatically. In the release notes for the KB5127936 preview update, dated October 28, 2026, Microsoft wrote that "supported PCs may now have memory integrity (HVCI) enabled during updates". The change then carried over to the November 2026 security update (KB5132061) for Windows 11 25H2 and 26H2. Requirements include an 8th-gen Intel or AMD Zen 2 processor or newer, at least 8GB of RAM and compatible drivers On eligible devices, Windows updates can turn Memory Integrity on automatically after passing Microsoft's compatibility checks. According to Windows Central, most modern PCs already had it on from the start, so the change is most noticeable on older PCs that never used it. The good news is that if you've already turned Memory Integrity off manually, Windows won't switch it back on.
How to Turn Off Memory Integrity Safely
Before you turn it off, understand the risk. Microsoft itself has acknowledged the feature can affect performance "in some scenarios and some configurations of gaming devices," but it also warns that turning it off leaves your device more exposed to certain threats. So leave Memory Integrity on as your default. Only try turning it off if you've found a measurable performance problem in a specific game, you understand the risk and your PC isn't used for sensitive work software.
Open Windows Security > Device Security > Core isolation details.
Switch Memory integrity to Off, then restart your PC.
Keep in mind that turning off Memory Integrity doesn't automatically turn off VBS as a whole. You can check the status in System Information (msinfo32), but VBS doesn't have to show Not enabled for the step above to make a difference. You can turn Memory Integrity back on anytime from the same menu.
How to Check Whether the Settings Worked
Before you change anything, run the same game at the same resolution, graphics preset and test scenario. Write down your average FPS, 1% low FPS and frame times if you can see them. Change one setting at a time, then run the test again. If things don't improve or you run into stability problems, switch the setting back. That's the most reliable way to find the best Windows 11 settings for gaming on your own PC.